Introduction to Docker
Software developers often struggle with deploying their apps, this is because the development environment is often different from the production environment. This can cause issues when deploying the app. To solve this issue, you can use something called Docker containers. In this tutorial we will go over what Docker is and how to use it.
What is a Container?
A container is a portable environment that contains everything required to run your app. This includes the OS, dependencies, configuration, and your app. Using a container you can deploy an app on any machine that can run these containers, which allows you to be very flexible when it comes to deploying your app.
You cannot have a container without first having an image. An image is a template that is used to create containers. You can think of an image as a blueprint for a container. You can create multiple containers from the same image. This allows you to run multiple instances of your app on the same machine at the same time.
To make a new image, you will have to create a Dockerfile (without extension), which is a file that contains all the instructions required to create the image. You can then build the image using the docker build command. You can find more information about Dockerfiles here. We will not be making any Docker images in this tutorial, but we will use some images that are already available on Docker Hub, which is the official repository for Docker images.
About Docker
Docker is a platform that allows you to create, deploy, and run containers. It is the most popular container platform and is used by many companies. Docker is also open source, which means that you can use it for free. Docker is very easy to use, which makes it a great choice for beginners while having all functionality required to run complex systems.
Why do we need Containers?
There are multiple reasons why you would want to use containers, here are some of them:
- Portability
- You never have to worry about your app not running on a machine because of missing dependencies or configuration
- All required dependencies are included in the container
- It is its own sandboxed environment, which means that it is isolated from the host machine
- Agility
- You can easily deploy your app on any machine that can run containers
- No configuration is required on the host machine
- Makes the lives of DevOps engineers easier
- Scalability
- You can easily scale your app horizontally by running multiple instances of the same container
- You can also scale vertically by increasing the resources available to the container
- Makes it easier to design and implement a microservice architecture
Setting up Docker
First, you have to install the Docker engine itself, after you have installed the Docker engine, we can start using it to create containers. You can check if Docker is installed correctly by running the following command:
docker --version
If you get an output similar to this, then Docker is installed correctly:

Using Docker for the first time
Now that you have downloaded and set up Docker, we can start experimenting and using it to run some containers. Be sure to run the Docker Engine before following the rest of this tutorial.
Hello-World
We will start off by just running a very simple container that only prints something to the console. To do this, run the following command:
docker run hello-world
After running that command, your output should look something like this:
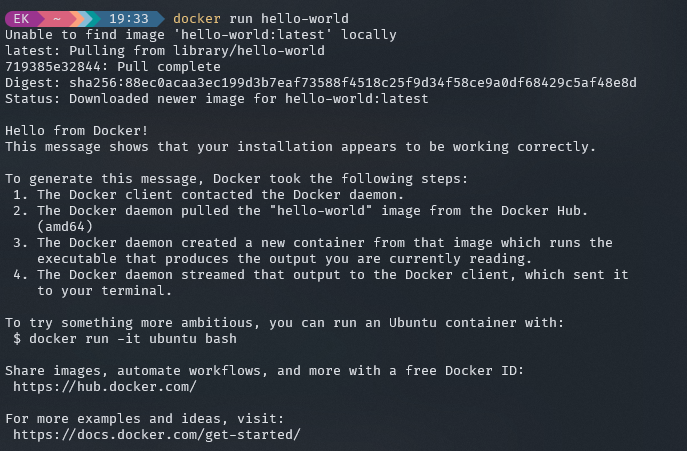
Let's go over what each line means:
Unable to find image 'hello-world:latest' locallymeans that Docker was unable to find the image on your machine, so it downloaded it from Docker Hublatest: Pulling from library/hello-worldmeans that Docker is pulling the image from Docker Hub, it is using the latest available version by default, you can specify the version by doinghello-world:version.number
After these 2 messages, Docker just loads the image from Docker Hub and then creates a container from the image. Then this container is started and prints out our "Hello from Docker!" message. After this, the container exits.
Congratulations on running your first container! Now let's move on to something a bit more complex.
Where's my Container?
Now that you have ran your first container, let's see if we can do more stuff with Docker. Let's start off by looking at our current running containers. You can do it by doing the following command:
docker container ls
# or
docker ps
This will show you the currently running containers, in our case this list should be empty. But wait, we just ran the "hello-world" container, so why is it not showing up here? Well, that is because that container has already exited, and Docker does not show exited containers by default, if you want to see all containers, you can run the following command:
docker container ls -a
# or
docker ps -a
Now you will see that there is a container, namely the "hello-world" container. Its status is "exited" which means it has stopped executing and is no longer running.
Let's remove this container, to do this, run the following command:
docker container rm <container-id>
You do not have to type the full id of the container, since they are unique, you can just type the first few characters.
Images, the blueprints of Containers
Now we have removed the container, but remember how containers are actually created from images? Well, this means that we can find the "hello-world" image somewhere in Docker. We can look for it by running:
docker image ls
# or
docker images
This will show us a list of all the images that we have on our machine. You should see something like this:
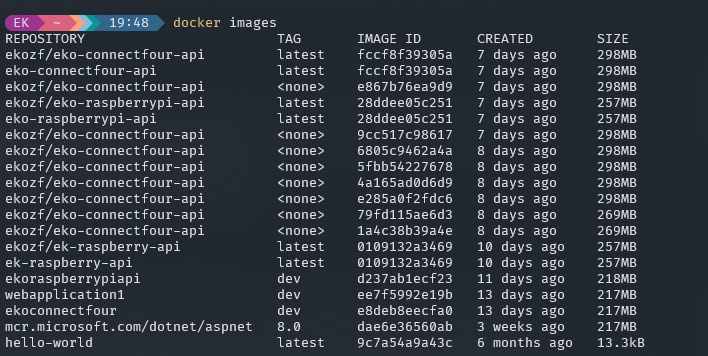
On my own machine I have a lot of different images, but on yours you might only see the "hello-world" image. Now let's re-run the "hello-world" container, but this time we will do it twice, to do this, run the following command:
docker run hello-world && docker run hello-world
Now you will see that it did not mention downloading or pulling from Docker Hub, this is because the image (the blueprint), is already locally available. If you view the containers now using docker ps -a you will see that there are 2 containers. As you can see in the column called "IMAGES", both of these containers use the same image, but they have different container IDs. This is because each container is its own instance of the image and can be run seperately in isolation.

Now let's delete these 2 containers by using docker container rm <container-id> again. Another tip, if you want containers to be auto-deleted once they exit, you can run them like this using the --rm flag: docker run --rm hello-world, this will delete the container when it exits. Now let's also remove the "hello-world" image. To do this, run the following command:
docker image rm hello-world
After running the command above, the "hello-world" image should be removed from your machine. Now let's move on to something a bit more complex.
Running an entire OS within a Container
Now that we have played around with Docker, let's do something more fun, like running an entire OS within a container. To do this, we will use a very small and lightweight Linux OS called 'Alpine'.
Let's first download the image from Docker Hub by running the following command:
docker pull alpine
This will download the Alpine image to your machine. Now let's run the container by running the following command:
docker run -it alpine
The -it flag is used to run the container in interactive mode, which means that you can interact with the container. Now you should see something like this:
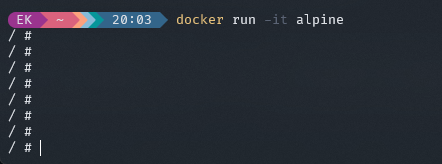
This is the interactive shell that you can use for anything you like, it supports most Linux commands, so let's make it print something out. Run the following command:
echo "Hello from Alpine!"
By running that you should see "Hello from Alpine!" in the terminal, next let's do ls to view the files in the current directory. You should see something like this:

This is the filesystem of the Alpine container itself, not from your host or anywhere else. It is completely seperate from anything you have on your host machine, which means that you can do anything you want in here without worrying about messing up your host machine. Now let's exit the container by running exit.
Now let's run the container again, but this time we will run it in detached mode, which means that it will run in the background and not prompt us. To do this, run the following command:
docker run -dit alpine
Now alpine is running in the background, but we are not in the container, so how do we interact with it? Well, we can use the docker exec command to execute commands inside the container. To do this, run the following command:
# first get out container id
docker ps

# then run the following command
docker exec -it <container-id-for-alpine> sh
After running that command, we should be inside of our container just like we were before, using docker exec allows you to run commands inside of a container without having to be inside of it. Now let's exit the container again by running exit.
Since the container is running in the background because of our -d flag, we have to stop it manually. To do this, run the following command:
docker container stop <container-id-for-alpine>
Need some Help?
Sometimes people forget things, but do not worry, Docker has your back here, you can always go to the documentation or use the --help flag at the end of your command to see the different available options. You can also use the docker help command to see a list of all the available commands.
Conclusion
This was a small introduction and guide to Docker, there is a lot more that you can do with Docker, but with these basic commands you can already do a lot. I hope you enjoyed this tutorial and learned something new. If you want to learn more about Docker make sure to check out their docs or continue reading!